Lovie or Lovey however you spell it. Those simple small blankets with or without tags. This one happens to be just a scrap piece of minky and cotton fabric that I had and a bib that was too cute to put away.
You need at least 2 things a front and a back - if you wanna add an embellishment like a cute puppy, go ahead.
1. cut out your puppy and saying and sew around them onto the fabric you choose
trim your other fabric and put the fabrics right sides together.
sew around them leaving a hole to turn inside out. (you can pin this all together if you want so it stays but I don't really do that with little projects cuz I just really am not that picky)
fold right side out.
have a cute sick rambunctious toddler making a mess out of everything in the background.
sew together your hole by folding in those ends and sewing almost to the edge. (you can hand sew it so you don't see the seam, but I'm waaayy too lazy for all that mess!)
voila finished product.
Showing posts with label personal. Show all posts
Showing posts with label personal. Show all posts
Saturday, May 14, 2011
Making a Queen Comforter to a Full
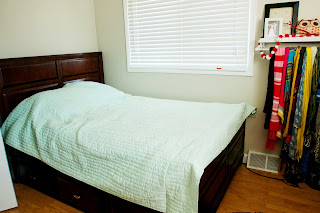
Had to improvise with this gorgeous comforter that was given to me a couple years ago by my cousin. It's been on our bed, but kept falling off all the time because our bed is so small. So my friend Keri told me her mom had ingeniously decided to cut a comforter down and I gave it a whirl.
before - queen sized
cut it in half (I cut so that the seam was more to one side, not on purpose. I just didn't realize it)
Then I didn't cut quite enough so I cut out another bit
So now it's the right width
need to cut some off the length (leaving the end so you have the finished edges)
so there is the cut out middle section off the bottom.
So now it's the size of a full size bedspread. just need to pin them together and sew
you can sorta see where it is if you look close, but I think it's great. I love this bedspread
Wednesday, April 20, 2011
Salon Remodel
Remodeling the salon. This is the very start.
Thinking shabby chic meets sleek. Black salon chairs, black furniture with some antique wood pieces thrown in. Ashley Ann Photography really inspired me with her bedroom to just go for different.
Gray/taupe wall color. The vinyl flooring has those colors in it. Gray curtain fabric is behind the 2 colorful ones.
Also found a really cute blog in the process World in a Paper Cup
Find it HERE
Love these mirrors - would love to paint some for in front of the salon chairs which we are recovering in black.
frame wall found HERE
frame collection found HERE
I like how THIS ONE uses fabric, open frames, rectange and oval, and some other elements
Waiting room Chairs. I am wanting to paint and use some cool fabrics. Add some animal prints in.
How fun is this? I lost the link to this one :(
I really like this one as is WOW
These are really cool
Thinking shabby chic meets sleek. Black salon chairs, black furniture with some antique wood pieces thrown in. Ashley Ann Photography really inspired me with her bedroom to just go for different.
Also found a really cute blog in the process World in a Paper Cup
Find it HERE
Love these mirrors - would love to paint some for in front of the salon chairs which we are recovering in black.
frame wall found HERE
frame collection found HERE
I like how THIS ONE uses fabric, open frames, rectange and oval, and some other elements
Waiting room Chairs. I am wanting to paint and use some cool fabrics. Add some animal prints in.
How fun is this? I lost the link to this one :(
I really like this one as is WOW
These are really cool
Saturday, April 9, 2011
Behind in so many photos
Baby Album I'm working on for my son. Took a picture for the first 365 days of his life. More to come of the album. Thinking ahead to his senior year graduating at high school and decided I wanted to keep it simple. So the album will have these pages, the next year will be 1 picture a month, the next year will be 1 page a season. I will add in pages here and there for special days/events. Of course I'll overachieve and make other albums that he can look back on, but I wanted to keep a few simple photo books for him.
Subscribe to:
Posts (Atom)


